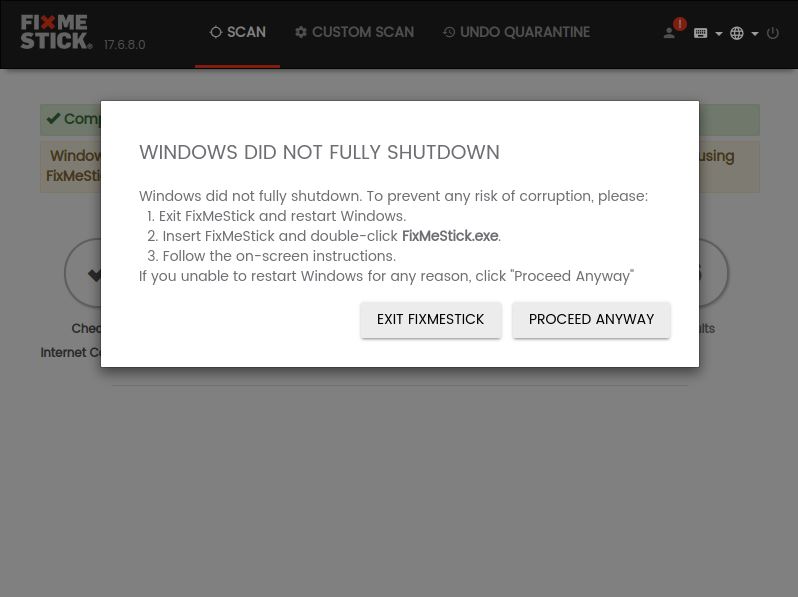
In this article, we explain the steps you need to take when you have already clicked on reboot and start and your PC booted into a FixMeStick scan but on your screen you see a pop up error message that says: Windows did not fully shutdown.
By following this process, you will be able to run your scan successfully.
Index:
Restart the Scan from Within Windows
Disable Fast Startup & Boot Menu
You may see this message when using a Windows 8, 8.1, 10 or 11 computer and you do not start the FixMeStick scan from the FixMeStick.exe program found in your File Explorer but from the boot menu.
The reason for this is that when Windows 8, 8.1, 10 and 11 computers are turned off, they do not shut down entirely but rather enter a hibernation mode in order to speed up the computers' rebooting process. This feature lets Windows save some of your computer’s files to a hibernation file before the shutdown so when you turn the computer back on the system will use these files to boot the computer faster.
When you start the scan from the FixMeStick.exe program, the FixMeStick is supposed to configure the computer to automatically turn off hibernation so that it's able to properly and safely scan and quarantine files while they're fully turned off in your computer. This prevents any unwanted or potentially harmful changes from being made to your system files.
Restart the Scan from Within Windows
If you see this message you can click on Proceed Anyway and your scan will run normally. However, the FixMeStick will not clean any of the infections it finds, if any. Here is what you is recommended that you do to run your scan successfully:
1. Click on Exit FixMeStick in the box.
- This will shut down your computer. Allow the computer to turn off.
2. Once the computer is off; remove the FixMeStick from the USB port.
If you are able to log into your computer and access Windows, you can follow the steps below. If you are unable to log into your Windows operating system, please skip these steps and move on to Disabling Fast Startup.
3. Turn the computer back on and log into Windows.
4. Follow these steps to start FixMeStick from the .exe program.
Note: If you are unable to use the FixMeStick.exe program to run a scan because you do not see it on your computer or after running the scan once again you still get the same message, you will have to disable a feature on your computer called Fast Startup using the instructions below. After you have done so, you can boot the FixMeStick from windows again or from your Boot Menu by following the instructions at the bottom of this article.
Disable Fast Startup & Boot Menu
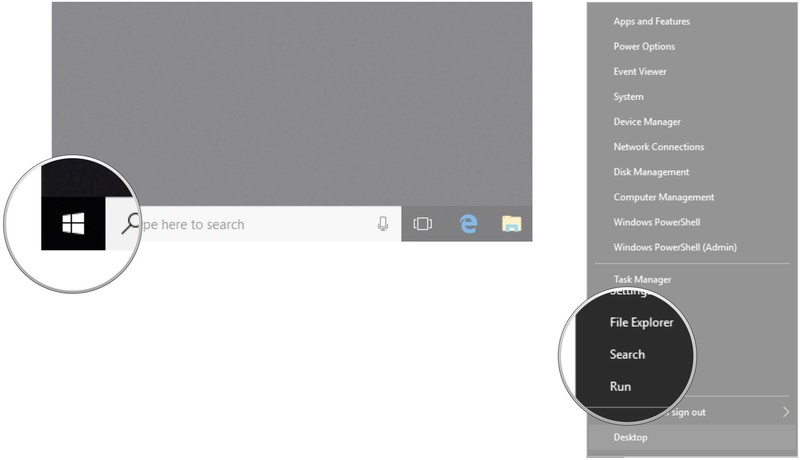
1. Open your start menu by pressing on the Windows key on your keyboard or by left clicking the Windows icon at the bottom left corner of your screen.
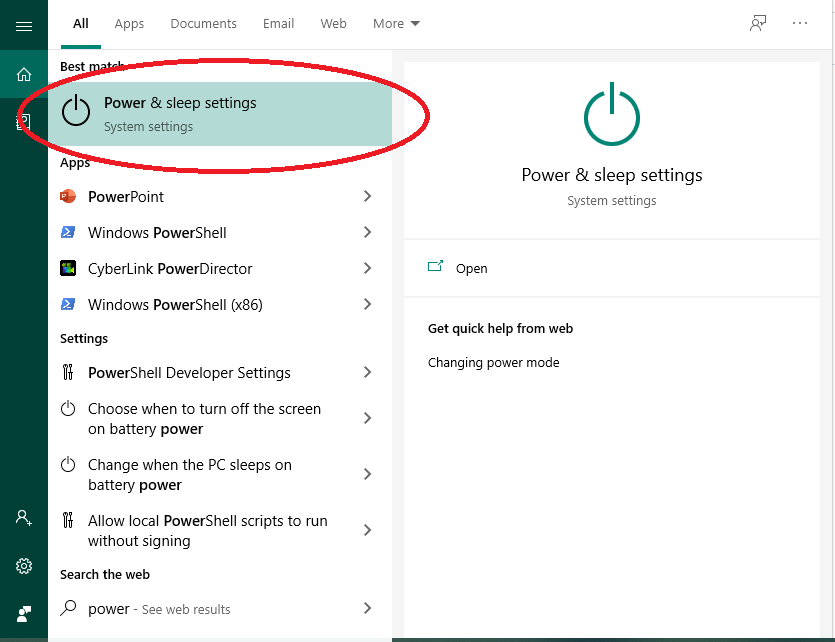
2. (If you are using Windows 8) you can jump this step to step 3. (If you are using Windows 10/11) Search for Power & Sleep Settings, and click on the appropriate option. (You can either search for the power & sleeping in the main menu or simply type power settings in the search box.)
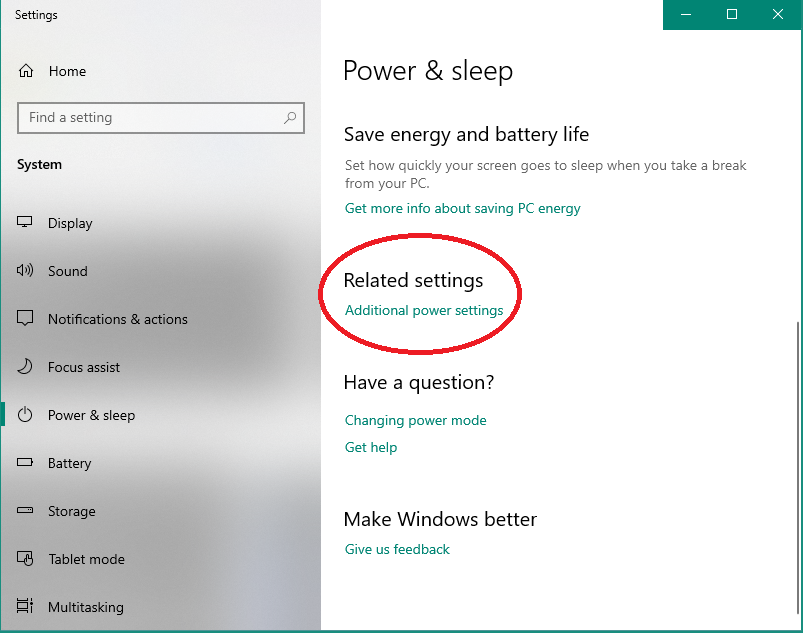
(Windows 10/11 users will then be brought to page with Power & Sleep Settings. Once there, you can scroll down until you see an option entitled Additional Power Settings)
3. Search for Power and select Power Options.
4. On the next screen called Power Options (or Power & Sleep Settings), Select Choose what the power buttons do on the left hand side of the window.
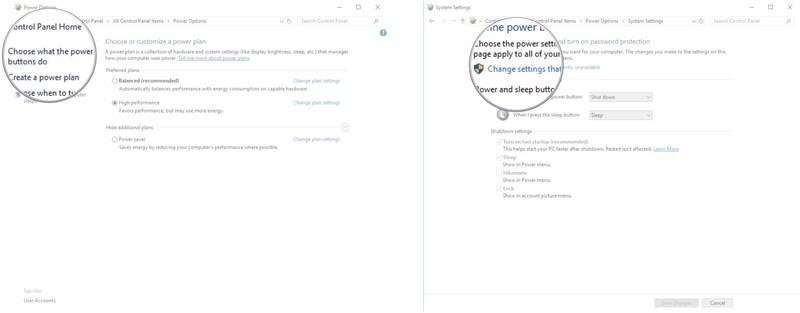
5. On the Define power buttons and turn on password protection screen, look for your Shutdown settings. If they do not appear, click on Change settings that are currently unavailable next to the blue and yellow flag and take another look.
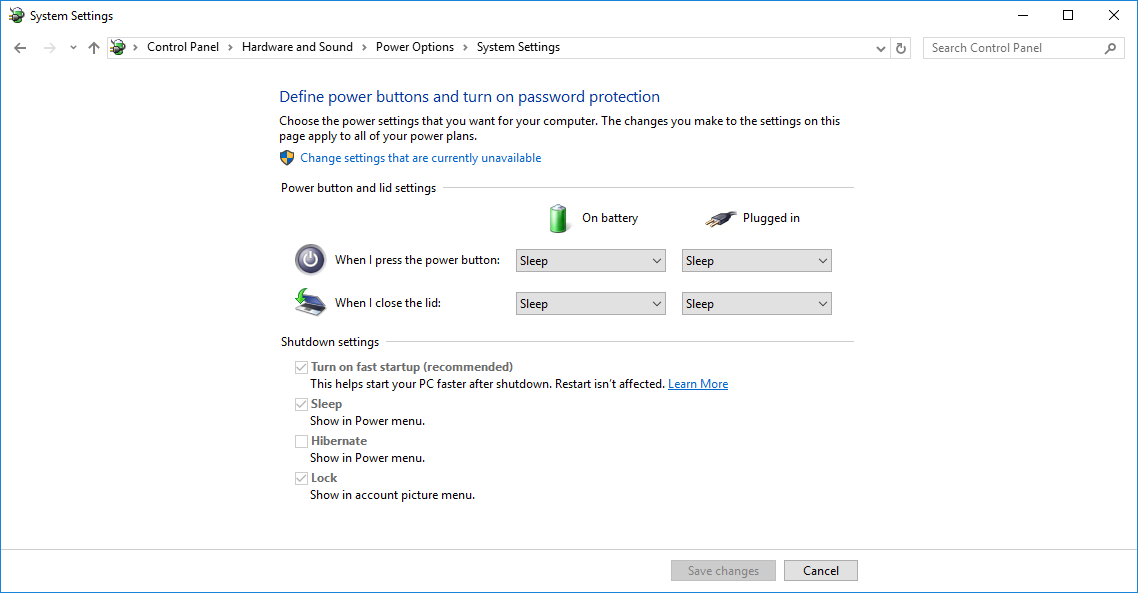
- Under shutdown settings: You should see four options:
- Turn off fast startup
- Sleep
- Hibernate
- Lock
*If you only see sleep and lock under the Shutdown settings, please look at note below.
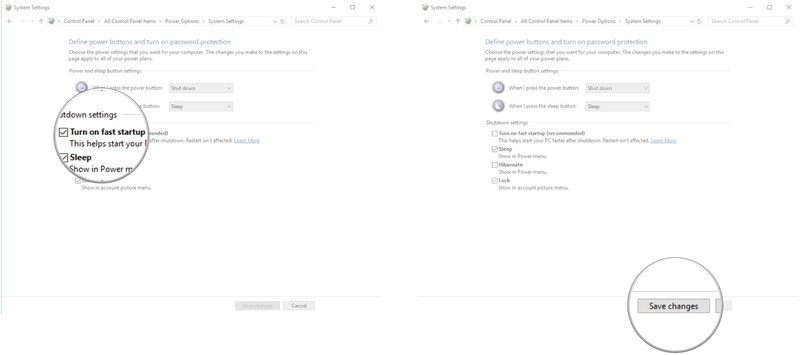
6. Uncheck the box beside Turn on fast startup by left-clicking the box. If it the box is unchecked, there is no need to click.
7. Save your changes by clicking Save Changes at the bottom right of your screen and close all the related windows that were opened.
Note: If you only see two options under shutdown settings, these will probably be sleep and lock, in this case, you can enable a feature on your computer called hibernate using these instructions:
8. Right-click on your Start Menu, and then left click on Command Prompt (Admin)
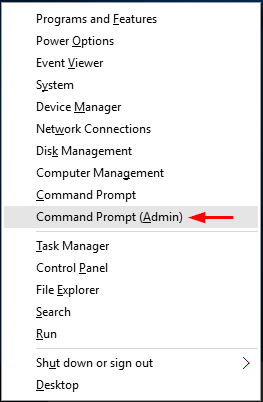
9. When you are prompted by User Account Control, click Continue.
10. At the command prompt, type powercfg.exe /hibernate on, and then press Enter.
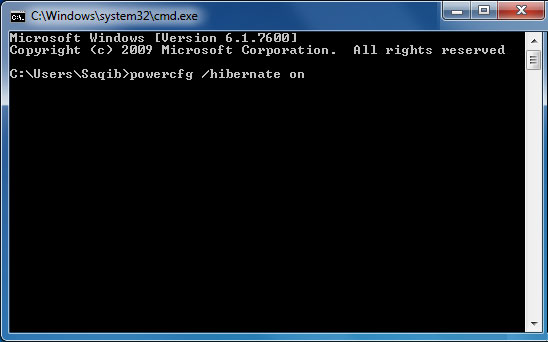
11. Exit the Command prompt. You can click the X in the top-right corner of the window.
12. Go back to step 1 and follow the instructions, you should see 4 options under shutdown settings this time when you get to step 4.
13. After you have disabled fast startup, you can either boot the FixMeStick from Windows, using these instructions or you can launch your FixMeStick from the Boot Menu by using the instructions below.
Boot Menu
1. To launch the FixMeStick from the Boot Menu, you will have to know your computer’s boot menu key first. Please look at this article to find your computer's boot menu key.
2. Turn your computer off and plug the FixMeStick back in one of the USB ports in your computer. If you're using a desktop computer, please use one of the USB ports on the back of the computer tower.
3. Press your power button and as soon as your computer starts restarting, continuously tap the appropriate boot menu key that you located earlier.
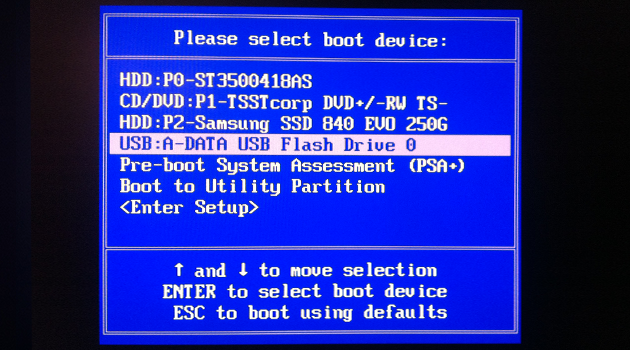
- When your screen changes and you see your computer’s boot menu, you can stop hitting the boot menu key.
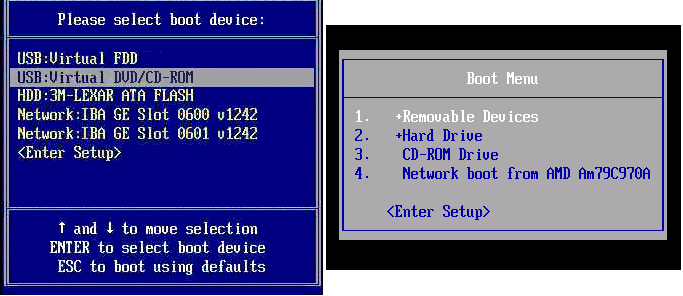
- On this screen, your mouse does not work. Use the arrow keys on your computer to highlight the option for FixMeStick, and press Enter.
In some cases, you will be brought to a Startup Menu - you can typically navigate using the appropriate keys to select the Boot Device Options.

4. The FixMeStick will show up under different titles, depending on the type of computer. Look for FixMeStick, USB HDD, FixMeStick USB, Removable Storage Device, or USB. Highlight the option that you see, and press Enter.
- Your scan should begin successfully.