By default the FixMeStick will run a full system scan. Quick Scan is a new scanning mode available inside the Scanner. Quick Scan makes a file selection based on what files are typically running in the background when Windows is running on your computer. These files are deemed the most common threat locations, and are filtered for a shorter scan. The Quick Scan normally spans between 8-10 minutes, and usually scans anywhere between 4000-8000 files.
The Quick Scan feature is available from within the FixMeStick scan, in the top navigation bar. To enable it, follow the instructions below.
1. Start your scan as you normally would. If you aren't sure of how to start your FixMeStick click here. If you're using a Mac computer, click here.
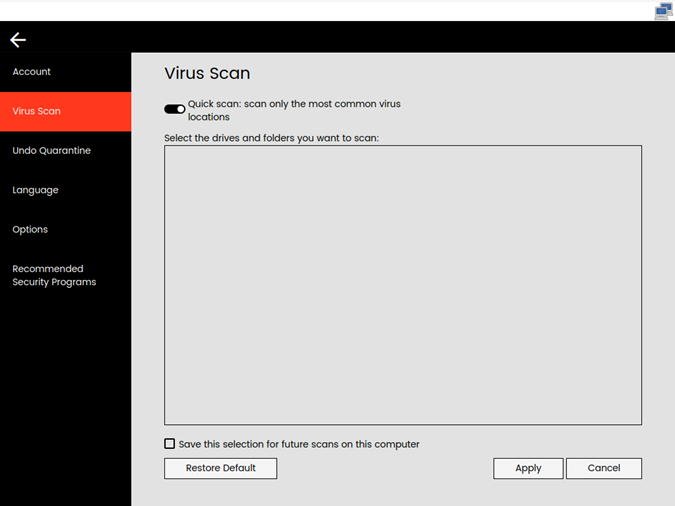
2. Once you've started a scan and waited until it gets past Step 1: Checking Internet Connection, click on the Settings icon in the navigation bar at the top of the screen.

3. Click on Virus Scan in the panel on the left, then select the Quick Scan button and click Apply
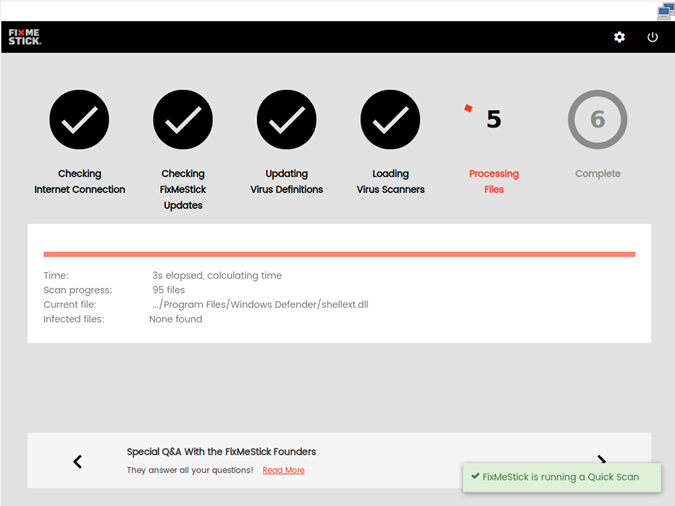
4. The scan will now restart and you will see a message in the bottom right-hand corner that says 'FixMeStick is running a Quick Scan'.
5. Once the scan is complete, the program will show you everything it found, and ask if you would like to clean it. Simply left-click Clean. If no threats were found, you can skip this option.
6. When the FixMeStick has completed its cleaning, you will receive a notice to exit FixMeStick and restart your computer. Once you left-click exit, you can remove our USB device and start your computer again. If you are having issues after a scan, please visit our Knowledge Base page for post-scan issues by clicking here.
If you are experiencing difficulties starting a Quick Scan, please e-mail us at support@fixmestick.com.